


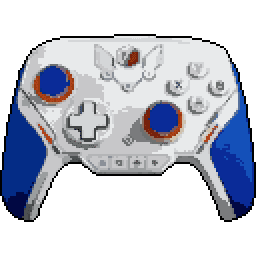
BigBig Won Blitz 2


BigBig Won Blitz 2 Input lag comparison
| # | Connection | Mode | LatencyAverage (ms) | Polling RateMedian (Hz) | Jitter | OSBuild ver. | FWTester ver. | |
|---|---|---|---|---|---|---|---|---|
| Latency P82 | ||||||||
1 | Cable PRIMARY | XInput | 5.15 2.00 | 1000 | 0.56 0.33 | Win 11 10.0.26200 | 313333 5.3.0.1 | |
Stick LatencyP82 ✓ Selected 1.33 ms 2 ms 2.78 ms 0.33 ms 1000 Hz (see 📊) Polling Rate 0.46 ms 1 ms 1.58 ms 0.22 ms 1000 Hz 1000.06 Hz Note: This test are based on polling rate and do not represent actual input-lag. | ||||||||
2 | Cable | XInput | 5.36 2.17 | 2000 | 0.57 0.27 | Win 11 10.0.26200 | 313333 5.3.0.1 | |
Stick LatencyP82 1.56 ms 2.17 ms 2.77 ms 0.27 ms 2000 Hz (see 📊) Polling Rate 0.43 ms 0.5 ms 1 ms 0.05 ms 2000 Hz 2000.37 Hz Note: This test are based on polling rate and do not represent actual input-lag. | ||||||||
3 | Dongle PRIMARY | XInput | 6.57 3.36 | 1000 | 0.59 0.43 | Win 11 10.0.26200 | 313333 5.3.0.1 | |
Stick LatencyP82 ✓ Selected 2.48 ms 3.36 ms 4.31 ms 0.43 ms 1000 Hz (see 📊) Polling Rate 0.47 ms 1 ms 1.59 ms 0.21 ms 1000 Hz 1000.82 Hz Note: This test are based on polling rate and do not represent actual input-lag. | ||||||||
4 | Cable | XInput | 6.48 2.45 | 500 | 0.66 0.57 | Win 11 10.0.26200 | 313333 5.3.0.1 | |
Stick LatencyP82 1.35 ms 2.45 ms 3.52 ms 0.57 ms 500 Hz (see 📊) Polling Rate 1.87 ms 2 ms 2.54 ms 0.07 ms 500 Hz 502.23 Hz Note: This test are based on polling rate and do not represent actual input-lag. | ||||||||
5 | Cable | Sony | 5.92 2.59 | 1592.36 | 0.62 0.24 | Win 11 10.0.26200 | 313333 5.3.0.1 | |
Stick LatencyP82 2.01 ms 2.59 ms 3.14 ms 0.24 ms 1592.36 Hz (see 📊) Polling Rate 0.61 ms 0.63 ms 2.51 ms 0.41 ms 1592.36 Hz 1105.86 Hz Note: This test are based on polling rate and do not represent actual input-lag. | ||||||||
6 | Dongle | XInput | 6.94 3.61 | 1996.01 | 0.63 0.40 | Win 11 10.0.26200 | 313333 5.3.0.1 | |
Stick LatencyP82 2.76 ms 3.61 ms 4.68 ms 0.4 ms 1996.01 Hz (see 📊) Polling Rate 0.43 ms 0.5 ms 1.05 ms 0.1 ms 1996.01 Hz 2000.7 Hz Note: This test are based on polling rate and do not represent actual input-lag. | ||||||||
7 | Dongle | XInput | 6.71 3.96 | 500.25 | 0.61 0.56 | Win 11 10.0.26200 | 313333 5.3.0.1 | |
Stick LatencyP82 2.86 ms 3.96 ms 5.22 ms 0.56 ms 500.25 Hz (see 📊) Polling Rate 1.91 ms 2 ms 2.48 ms 0.04 ms 500.25 Hz 500.72 Hz Note: This test are based on polling rate and do not represent actual input-lag. | ||||||||
8 | Dongle | Sony | 7.09 3.68 | 1582.28 | 0.62 0.38 | Win 11 10.0.26200 | 313333 5.3.0.1 | |
Stick LatencyP82 2.86 ms 3.68 ms 4.86 ms 0.38 ms 1582.28 Hz (see 📊) Polling Rate 0.61 ms 0.63 ms 3 ms 0.47 ms 1582.28 Hz 1000.4 Hz Note: This test are based on polling rate and do not represent actual input-lag. | ||||||||
9 | Cable | XInput | 7.16 3.49 | 250.06 | 1.12 1.14 | Win 11 10.0.26200 | 313333 5.3.0.1 | |
Stick LatencyP82 1.45 ms 3.49 ms 5.55 ms 1.14 ms 250.06 Hz (see 📊) Polling Rate 3.53 ms 4 ms 4.51 ms 0.08 ms 250.06 Hz 250.74 Hz Note: This test are based on polling rate and do not represent actual input-lag. | ||||||||
10 | Dongle | XInput | 8.66 5.08 | 250.06 | 1.14 1.13 | Win 11 10.0.26200 | 313333 5.3.0.1 | |
Stick LatencyP82 3.02 ms 5.08 ms 7.33 ms 1.13 ms 250.06 Hz (see 📊) Polling Rate 3.49 ms 4 ms 4.61 ms 0.16 ms 250.06 Hz 251.99 Hz Note: This test are based on polling rate and do not represent actual input-lag. | ||||||||
11 | Cable | Switch | 10.0 7.33 | 123.08 | 2.39 2.49 | Win 11 10.0.26200 | 313333 5.3.0.1 | |
Stick LatencyP82 2.28 ms 7.33 ms 12.2 ms 2.49 ms 123.08 Hz (see 📊) Polling Rate 4.13 ms 8.12 ms 8.25 ms 0.37 ms 123.08 Hz 124.88 Hz Note: This test are based on polling rate and do not represent actual input-lag. | ||||||||
12 | Dongle | Switch | 11.5 8.64 | 123.08 | 2.37 2.53 | Win 11 10.0.26200 | 313333 5.3.0.1 | |
Stick LatencyP82 3.65 ms 8.64 ms 13.79 ms 2.53 ms 123.08 Hz (see 📊) Polling Rate 4.13 ms 8.12 ms 8.25 ms 0.29 ms 123.08 Hz 124.66 Hz Note: This test are based on polling rate and do not represent actual input-lag. |
Latency
Our visualization focuses on Average Latency, presented as vertical bars to make comparing performance across different connection modes (Wired, Bluetooth, Dongle) instant and intuitive.
The chart differentiates between:
- Button Latency: How quickly the game registers a physical button press.
- Stick Latency: The delay in registering joystick movement (tested at 99% deflection).
Visualizing Stability (Jitter)
You may notice that the top portion of some bars is semi-transparent or "faded". This represents Jitter (instability):
- Solid Bar: Represents the stable, consistent average latency.
- Faded Top: Indicates the variance. A larger transparent area means higher jitter, implying the controller's response time fluctuates. A solid bar with little to no fading indicates a highly stable connection.
Deep Dive: Click the arrow to reveal Probability Distribution Charts. These show the exact breakdown of every input tested, displaying Probability (%) on the Y-axis and Latency (ms) on the X-axis.
Polling Rate vs. Latency
It is crucial to understand that Polling Rate and Latency are measured using two entirely different methodologies on our site:
- Latency (ms) is measured by the Prometheus 82 hardware. It captures the physical movement of the stick or button via hardware interrupts with microsecond precision. This is the "real-world" delay.
- Polling Rate (Hz) is measured via a Software Tool. It shows how often the OS receives reports from the USB stack.
Common Myth: A higher polling rate (like 8000 Hz) does not automatically guarantee lower latency if the controller's internal processing is slow. Conversely, a high polling rate on a chart might show fluctuations (e.g., 7800Hz instead of 8000Hz) due to OS jitter or CPU scheduling, which does not necessarily impact the hardware latency measured by the P82.
To test your own gamepad's polling rate, you can use our tool: Download Polling Rate Tester.
Testing Methods
Gamepadla ensures data integrity by combining three distinct testing methodologies:
-
Prometheus 82 (P82): Our gold standard. A custom-built hardware device that physically actuates buttons and sticks. It uses high-speed hardware interrupts to capture events, making it independent of the controller's polling rate. It provides an error margin of only ±1ms for buttons and sticks. View on GitHub.
-
GPDL Tester: An electrical monitoring tool for highly accurate button latency. While P82 simulates human-like mechanical movement, GPDL focuses on the electrical signal speed. View on GitHub.
-
Software Polling Test: A pure software diagnostic to check communication frequency. We use this to verify if a controller actually reaches its advertised specs (e.g., 1000Hz or 8000Hz) at the OS level. Download Software.
Note: By comparing hardware-level latency (P82) with software-level reports (Polling Test), we can identify if a controller has "fake" high polling rates or poorly optimized firmware.
Stick test of BigBig Won Blitz 2
Stick test results for BigBig Won Blitz 2 gamepad, by Danny89
Comment: Raw mode
Errors Panel
Inner Deadzone
The Inner Deadzone is the area around the center of the stick where small movements are not registered. This helps prevent stick drift or accidental inputs, but if the deadzone is too large, it can make aiming less precise, especially in games requiring fine control. We evaluate the Inner Deadzone based on how much you need to move the stick before it responds - the less movement required, the better.
The BigBig Won Blitz 2 has no Inner Deadzone. The stick responds immediately to even the slightest movement, which is excellent for aiming accuracy and micro-control. This makes it a great choice for precision-heavy games like first-person shooters (e.g., Valorant or Apex Legends).
For comparison, many budget gamepads often have a moderate to large Inner Deadzone, while premium controllers typically aim for a slight or no deadzone for better precision.
Want to learn more? Check out our video explanation of how the Inner Deadzone works.
Outer Deadzone
The Outer Deadzone is the area near the edge of the stick's physical range where you are still deflecting it, but the system already registers the maximum 100% input. As a result, maximum speed (e.g., camera turn) is reached before the stick hits the physical gate. This narrows the effective range for precise aiming and can make edge control feel too sharp or twitchy. The smaller this zone, the better, as it allows you to use the entire physical range of the stick for precise control.
The BigBig Won Blitz 2 has no Outer Deadzone (< 0.4 mm). Any 'lost' range at the edges is within the margin of error, allowing you to use the full physical range of the stick. This is an ideal result for precise and predictable gameplay.
Per-stick breakdown for the BigBig Won Blitz 2: the left stick measures < 0.4 mm, which corresponds to no Outer Deadzone, while the right stick measures < 0.4 mm, which corresponds to no Outer Deadzone. This helps show whether the controller loses range evenly on both sticks or if one stick is noticeably weaker near full tilt.
Both sticks show the same measured Outer Deadzone, which suggests consistent edge behavior between movement and camera inputs.
For comparison, budget gamepads often have moderate to large Outer Deadzones, while premium controllers strive for minimal or no deadzone to maximize control.
Want to learn more? Check out our video explanation of how the Outer Deadzone works.
Stick Asymmetry
Stick Asymmetry measures the consistency of the joystick's response across different directions at partial deflection (~80%) using physical limiters (brackets). This reveals asymmetries that might be hidden by clamping at 100% deflection. A high asymmetry score indicates a problem where for the same physical movement, the reported coordinates are inconsistent. The lower the percentage, the more predictable the stick movements. Lower is better.
For the BigBig Won Blitz 2, the Stick Asymmetry is 10.1% for the left stick and 6.8% for the right stick. Higher values can lead to noticeable inconsistencies, potentially impacting aiming or movement in games.
Testing Methodology: It's crucial to note that this test is performed at partial stick deflection (~80%), using special physical limiters (brackets/clips). Testing at 100% deflection often hides asymmetries because the controller's output is clamped at the maximum value, artificially 'smoothing' the resulting shape. Our method reveals the true performance of the stick in the ranges most critical for gameplay. This precise approach was also utilized by Linus Tech Tips in their controller review.
For comparison, many budget gamepads show asymmetry levels above 30%, while high-end controllers typically stay below 10% for better uniformity.
Learn more about how different gamepads perform in the Stick Asymmetry test and how to conduct such a test in this article. You can learn how to test joystick asymmetry yourself from this video.
Circle Error
Circle Error evaluates how closely the stick’s movement follows a perfect circle. A high Circle Error means the path is more square-like, which can cause inconsistent speeds when moving diagonally - your character might move faster or slower than expected. The lower the percentage, the better, as it ensures smooth, uniform movement in all directions.
For the BigBig Won Blitz 2, the Circle Error is 7.0% for the left stick and 7.0% for the right stick. This is an excellent result, providing smooth, natural diagonal movement similar to premium controllers.
For comparison, budget gamepads often have Circle Errors above 12%, resulting in 'square' feeling sticks, while high-quality ones aim for under 8% for better smoothness.
Want to learn more? Check out our video explanation of how Circle Error impacts performance.
Resolution (Stick Bitness)
Stick Bitness measures the precision of the joystick’s analog input, similar to bit depth in audio. Higher bitness means more distinct positions the stick can register, leading to smoother and more accurate control. Lower bitness can result in 'stepping' or less fluid movement, especially noticeable in slow, precise actions like aiming.
Unlike declared digital resolution, our True Bitness metric is derived from actual physical stick movement, reflecting the usable positions the stick can produce in practice.
For the BigBig Won Blitz 2, the movement-based True Bitness is 11.2 bits (left) and 11.3 bits (right). This is moderate precision. It is generally adequate for most games, though some stepping might be noticeable in high-precision aiming.
This corresponds to a measured Step Resolution of 0.00082 on the left stick and 0.00079 on the right. In practical terms, this means the gamepad can register about 1,214 individual steps from the center to the edge (SFC) on the left stick, and 1,260 SFC on the right.
For comparison, many budget gamepads have around 8 bits, while premium ones often exceed 10 bits for superior accuracy.
Want to learn more? Check out our video explanation of how Stick Bitness affects control. It is important to note that the video specifies the resolution of the stick, not the bit depth; the higher the bit depth, the higher the resolution.
Center Error (Stick Centering)
Center Error (also referred to as Stick Centering) measures how accurately the joystick returns to its neutral (center) position after you release it. A low Center Error prevents stick drift - a common issue where your character or camera moves slightly in a game, even when you're not touching the stick. The lower the percentage, the better the centering, and the less likely you are to experience drift.
For the BigBig Won Blitz 2, the Center Error is 3.5% for the left joystick and 2.4% for the right stick. This is a moderate result. Because this controller has no built-in inner deadzone to hide mechanical imperfections, its natural center error is exposed. You will likely need to configure a small deadzone within game settings (like in Apex Legends) to counteract potential drift.
This test methodology intentionally employs a more rigorous approach by implementing small-angle deflection and release, which produces the most challenging conditions for stick re-centering. This technique differs from the conventional maximum-deflection method where the stick is pulled to its full range and released, as small-angle deflection better simulates the micro-adjustments typically executed during actual gameplay scenarios, providing more representative data on potential stick drift occurrence during normal use.
Want to learn more? Check out our video explanation of how Center Error works.
Cardinal Snapping
Cardinal Snapping (sometimes referred to as Axis Magnet) is a form of stick processing where the controller's output artificially 'snaps' or clings to the cardinal (horizontal and vertical) axes when the stick passes close to them. While this can make pure horizontal or vertical movements feel perfectly straight, it distorts the natural movement path and makes diagonal aiming or fine steering less predictable.
The BigBig Won Blitz 2 shows no Cardinal Snapping. This means the stick does not artificially cling to the horizontal or vertical axes, preserving your real movement path for consistent aiming and natural analog control.
Want to learn more? Check out our video explanation of how Cardinal Snapping affects stick behavior.
Disclaimer
We tested the BigBig Won Blitz 2 gamepad using a single unit, so keep in mind that other units of this model might perform slightly better or worse. In most cases, these differences are minor and shouldn’t affect your experience significantly. The results were obtained with the Stick Tracer program, and some values might vary if you use different software or testing methods.
Testing conditions, such as the gamepad’s firmware version (FW: 313333) or connection type, can also influence the results. If you have this gamepad, we’d love for you to share your own test results! This will help us build a more comprehensive picture of the BigBig Won Blitz 2’s performance across different units.
Full test results can be viewed on the test page.
Stick test results for BigBig Won Blitz 2 gamepad, by Danny89
Comment: Raw mode
Errors Panel
Inner Deadzone
The Inner Deadzone is the area around the center of the stick where small movements are not registered. This helps prevent stick drift or accidental inputs, but if the deadzone is too large, it can make aiming less precise, especially in games requiring fine control. We evaluate the Inner Deadzone based on how much you need to move the stick before it responds - the less movement required, the better.
The BigBig Won Blitz 2 has no Inner Deadzone. The stick responds immediately to even the slightest movement, which is excellent for aiming accuracy and micro-control. This makes it a great choice for precision-heavy games like first-person shooters (e.g., Valorant or Apex Legends).
For comparison, many budget gamepads often have a moderate to large Inner Deadzone, while premium controllers typically aim for a slight or no deadzone for better precision.
Want to learn more? Check out our video explanation of how the Inner Deadzone works.
Outer Deadzone
The Outer Deadzone is the area near the edge of the stick's physical range where you are still deflecting it, but the system already registers the maximum 100% input. As a result, maximum speed (e.g., camera turn) is reached before the stick hits the physical gate. This narrows the effective range for precise aiming and can make edge control feel too sharp or twitchy. The smaller this zone, the better, as it allows you to use the entire physical range of the stick for precise control.
The BigBig Won Blitz 2 has no Outer Deadzone (< 0.4 mm). Any 'lost' range at the edges is within the margin of error, allowing you to use the full physical range of the stick. This is an ideal result for precise and predictable gameplay.
Per-stick breakdown for the BigBig Won Blitz 2: the left stick measures < 0.4 mm, which corresponds to no Outer Deadzone, while the right stick measures < 0.4 mm, which corresponds to no Outer Deadzone. This helps show whether the controller loses range evenly on both sticks or if one stick is noticeably weaker near full tilt.
Both sticks show the same measured Outer Deadzone, which suggests consistent edge behavior between movement and camera inputs.
For comparison, budget gamepads often have moderate to large Outer Deadzones, while premium controllers strive for minimal or no deadzone to maximize control.
Want to learn more? Check out our video explanation of how the Outer Deadzone works.
Stick Asymmetry
Stick Asymmetry measures the consistency of the joystick's response across different directions at partial deflection (~80%) using physical limiters (brackets). This reveals asymmetries that might be hidden by clamping at 100% deflection. A high asymmetry score indicates a problem where for the same physical movement, the reported coordinates are inconsistent. The lower the percentage, the more predictable the stick movements. Lower is better.
For the BigBig Won Blitz 2, the Stick Asymmetry is 10.5% for the left stick and 5.7% for the right stick. Higher values can lead to noticeable inconsistencies, potentially impacting aiming or movement in games.
Testing Methodology: It's crucial to note that this test is performed at partial stick deflection (~80%), using special physical limiters (brackets/clips). Testing at 100% deflection often hides asymmetries because the controller's output is clamped at the maximum value, artificially 'smoothing' the resulting shape. Our method reveals the true performance of the stick in the ranges most critical for gameplay. This precise approach was also utilized by Linus Tech Tips in their controller review.
For comparison, many budget gamepads show asymmetry levels above 30%, while high-end controllers typically stay below 10% for better uniformity.
Learn more about how different gamepads perform in the Stick Asymmetry test and how to conduct such a test in this article. You can learn how to test joystick asymmetry yourself from this video.
Circle Error
Circle Error evaluates how closely the stick’s movement follows a perfect circle. A high Circle Error means the path is more square-like, which can cause inconsistent speeds when moving diagonally - your character might move faster or slower than expected. The lower the percentage, the better, as it ensures smooth, uniform movement in all directions.
For the BigBig Won Blitz 2, the Circle Error is 6.8% for the left stick and 7.3% for the right stick. This is an excellent result, providing smooth, natural diagonal movement similar to premium controllers.
For comparison, budget gamepads often have Circle Errors above 12%, resulting in 'square' feeling sticks, while high-quality ones aim for under 8% for better smoothness.
Want to learn more? Check out our video explanation of how Circle Error impacts performance.
Resolution (Stick Bitness)
Stick Bitness measures the precision of the joystick’s analog input, similar to bit depth in audio. Higher bitness means more distinct positions the stick can register, leading to smoother and more accurate control. Lower bitness can result in 'stepping' or less fluid movement, especially noticeable in slow, precise actions like aiming.
Unlike declared digital resolution, our True Bitness metric is derived from actual physical stick movement, reflecting the usable positions the stick can produce in practice.
For the BigBig Won Blitz 2, the movement-based True Bitness is 11.2 bits (left) and 11.3 bits (right). This is moderate precision. It is generally adequate for most games, though some stepping might be noticeable in high-precision aiming.
This corresponds to a measured Step Resolution of 0.00082 on the left stick and 0.00079 on the right. In practical terms, this means the gamepad can register about 1,214 individual steps from the center to the edge (SFC) on the left stick, and 1,260 SFC on the right.
For comparison, many budget gamepads have around 8 bits, while premium ones often exceed 10 bits for superior accuracy.
Want to learn more? Check out our video explanation of how Stick Bitness affects control. It is important to note that the video specifies the resolution of the stick, not the bit depth; the higher the bit depth, the higher the resolution.
Center Error (Stick Centering)
Center Error (also referred to as Stick Centering) measures how accurately the joystick returns to its neutral (center) position after you release it. A low Center Error prevents stick drift - a common issue where your character or camera moves slightly in a game, even when you're not touching the stick. The lower the percentage, the better the centering, and the less likely you are to experience drift.
For the BigBig Won Blitz 2, the Center Error is 2.5% for the left joystick and 2.5% for the right stick. This is an excellent result. The sticks return almost perfectly to the center natively, without relying on an inner deadzone. This minimizes the risk of stick drift and is ideal for competitive gaming.
This test methodology intentionally employs a more rigorous approach by implementing small-angle deflection and release, which produces the most challenging conditions for stick re-centering. This technique differs from the conventional maximum-deflection method where the stick is pulled to its full range and released, as small-angle deflection better simulates the micro-adjustments typically executed during actual gameplay scenarios, providing more representative data on potential stick drift occurrence during normal use.
Want to learn more? Check out our video explanation of how Center Error works.
Cardinal Snapping
Cardinal Snapping (sometimes referred to as Axis Magnet) is a form of stick processing where the controller's output artificially 'snaps' or clings to the cardinal (horizontal and vertical) axes when the stick passes close to them. While this can make pure horizontal or vertical movements feel perfectly straight, it distorts the natural movement path and makes diagonal aiming or fine steering less predictable.
The BigBig Won Blitz 2 shows no Cardinal Snapping. This means the stick does not artificially cling to the horizontal or vertical axes, preserving your real movement path for consistent aiming and natural analog control.
Want to learn more? Check out our video explanation of how Cardinal Snapping affects stick behavior.
Disclaimer
We tested the BigBig Won Blitz 2 gamepad using a single unit, so keep in mind that other units of this model might perform slightly better or worse. In most cases, these differences are minor and shouldn’t affect your experience significantly. The results were obtained with the Stick Tracer program, and some values might vary if you use different software or testing methods.
Testing conditions, such as the gamepad’s firmware version (FW: 313333) or connection type, can also influence the results. If you have this gamepad, we’d love for you to share your own test results! This will help us build a more comprehensive picture of the BigBig Won Blitz 2’s performance across different units.
Full test results can be viewed on the test page.
Stick test results for BigBig Won Blitz 2 gamepad, by Danny89
Comment: Raw mode
Errors Panel
Inner Deadzone
The Inner Deadzone is the area around the center of the stick where small movements are not registered. This helps prevent stick drift or accidental inputs, but if the deadzone is too large, it can make aiming less precise, especially in games requiring fine control. We evaluate the Inner Deadzone based on how much you need to move the stick before it responds - the less movement required, the better.
The BigBig Won Blitz 2 has no Inner Deadzone. The stick responds immediately to even the slightest movement, which is excellent for aiming accuracy and micro-control. This makes it a great choice for precision-heavy games like first-person shooters (e.g., Valorant or Apex Legends).
For comparison, many budget gamepads often have a moderate to large Inner Deadzone, while premium controllers typically aim for a slight or no deadzone for better precision.
Want to learn more? Check out our video explanation of how the Inner Deadzone works.
Outer Deadzone
The Outer Deadzone is the area near the edge of the stick's physical range where you are still deflecting it, but the system already registers the maximum 100% input. As a result, maximum speed (e.g., camera turn) is reached before the stick hits the physical gate. This narrows the effective range for precise aiming and can make edge control feel too sharp or twitchy. The smaller this zone, the better, as it allows you to use the entire physical range of the stick for precise control.
The BigBig Won Blitz 2 has no Outer Deadzone (< 0.4 mm). Any 'lost' range at the edges is within the margin of error, allowing you to use the full physical range of the stick. This is an ideal result for precise and predictable gameplay.
Per-stick breakdown for the BigBig Won Blitz 2: the left stick measures < 0.4 mm, which corresponds to no Outer Deadzone, while the right stick measures < 0.4 mm, which corresponds to no Outer Deadzone. This helps show whether the controller loses range evenly on both sticks or if one stick is noticeably weaker near full tilt.
Both sticks show the same measured Outer Deadzone, which suggests consistent edge behavior between movement and camera inputs.
For comparison, budget gamepads often have moderate to large Outer Deadzones, while premium controllers strive for minimal or no deadzone to maximize control.
Want to learn more? Check out our video explanation of how the Outer Deadzone works.
Stick Asymmetry
Stick Asymmetry measures the consistency of the joystick's response across different directions at partial deflection (~80%) using physical limiters (brackets). This reveals asymmetries that might be hidden by clamping at 100% deflection. A high asymmetry score indicates a problem where for the same physical movement, the reported coordinates are inconsistent. The lower the percentage, the more predictable the stick movements. Lower is better.
For the BigBig Won Blitz 2, the Stick Asymmetry is 10.8% for the left stick and 5.1% for the right stick. Higher values can lead to noticeable inconsistencies, potentially impacting aiming or movement in games.
Testing Methodology: It's crucial to note that this test is performed at partial stick deflection (~80%), using special physical limiters (brackets/clips). Testing at 100% deflection often hides asymmetries because the controller's output is clamped at the maximum value, artificially 'smoothing' the resulting shape. Our method reveals the true performance of the stick in the ranges most critical for gameplay. This precise approach was also utilized by Linus Tech Tips in their controller review.
For comparison, many budget gamepads show asymmetry levels above 30%, while high-end controllers typically stay below 10% for better uniformity.
Learn more about how different gamepads perform in the Stick Asymmetry test and how to conduct such a test in this article. You can learn how to test joystick asymmetry yourself from this video.
Circle Error
Circle Error evaluates how closely the stick’s movement follows a perfect circle. A high Circle Error means the path is more square-like, which can cause inconsistent speeds when moving diagonally - your character might move faster or slower than expected. The lower the percentage, the better, as it ensures smooth, uniform movement in all directions.
For the BigBig Won Blitz 2, the Circle Error is 6.8% for the left stick and 7.2% for the right stick. This is an excellent result, providing smooth, natural diagonal movement similar to premium controllers.
For comparison, budget gamepads often have Circle Errors above 12%, resulting in 'square' feeling sticks, while high-quality ones aim for under 8% for better smoothness.
Want to learn more? Check out our video explanation of how Circle Error impacts performance.
Resolution (Stick Bitness)
Stick Bitness measures the precision of the joystick’s analog input, similar to bit depth in audio. Higher bitness means more distinct positions the stick can register, leading to smoother and more accurate control. Lower bitness can result in 'stepping' or less fluid movement, especially noticeable in slow, precise actions like aiming.
Unlike declared digital resolution, our True Bitness metric is derived from actual physical stick movement, reflecting the usable positions the stick can produce in practice.
For the BigBig Won Blitz 2, the movement-based True Bitness is 11.0 bits on both sticks. This is moderate precision. It is generally adequate for most games, though some stepping might be noticeable in high-precision aiming.
This corresponds to a measured Step Resolution of 0.00098 on the left stick and 0.00098 on the right. In practical terms, this means the gamepad can register about 1,024 individual steps from the center to the edge (SFC) on the left stick, and 1,024 SFC on the right.
For comparison, many budget gamepads have around 8 bits, while premium ones often exceed 10 bits for superior accuracy.
Want to learn more? Check out our video explanation of how Stick Bitness affects control. It is important to note that the video specifies the resolution of the stick, not the bit depth; the higher the bit depth, the higher the resolution.
Center Error (Stick Centering)
Center Error (also referred to as Stick Centering) measures how accurately the joystick returns to its neutral (center) position after you release it. A low Center Error prevents stick drift - a common issue where your character or camera moves slightly in a game, even when you're not touching the stick. The lower the percentage, the better the centering, and the less likely you are to experience drift.
For the BigBig Won Blitz 2, the Center Error is 3.2% for the left joystick and 2.6% for the right stick. This is a moderate result. Because this controller has no built-in inner deadzone to hide mechanical imperfections, its natural center error is exposed. You will likely need to configure a small deadzone within game settings (like in Apex Legends) to counteract potential drift.
This test methodology intentionally employs a more rigorous approach by implementing small-angle deflection and release, which produces the most challenging conditions for stick re-centering. This technique differs from the conventional maximum-deflection method where the stick is pulled to its full range and released, as small-angle deflection better simulates the micro-adjustments typically executed during actual gameplay scenarios, providing more representative data on potential stick drift occurrence during normal use.
Want to learn more? Check out our video explanation of how Center Error works.
Cardinal Snapping
Cardinal Snapping (sometimes referred to as Axis Magnet) is a form of stick processing where the controller's output artificially 'snaps' or clings to the cardinal (horizontal and vertical) axes when the stick passes close to them. While this can make pure horizontal or vertical movements feel perfectly straight, it distorts the natural movement path and makes diagonal aiming or fine steering less predictable.
The BigBig Won Blitz 2 shows no Cardinal Snapping. This means the stick does not artificially cling to the horizontal or vertical axes, preserving your real movement path for consistent aiming and natural analog control.
Want to learn more? Check out our video explanation of how Cardinal Snapping affects stick behavior.
Disclaimer
We tested the BigBig Won Blitz 2 gamepad using a single unit, so keep in mind that other units of this model might perform slightly better or worse. In most cases, these differences are minor and shouldn’t affect your experience significantly. The results were obtained with the Stick Tracer program, and some values might vary if you use different software or testing methods.
Testing conditions, such as the gamepad’s firmware version (FW: 313333) or connection type, can also influence the results. If you have this gamepad, we’d love for you to share your own test results! This will help us build a more comprehensive picture of the BigBig Won Blitz 2’s performance across different units.
Full test results can be viewed on the test page.
Stick test results for BigBig Won Blitz 2 gamepad, by Danny89
Comment: Raw mode
Errors Panel
Inner Deadzone
The Inner Deadzone is the area around the center of the stick where small movements are not registered. This helps prevent stick drift or accidental inputs, but if the deadzone is too large, it can make aiming less precise, especially in games requiring fine control. We evaluate the Inner Deadzone based on how much you need to move the stick before it responds - the less movement required, the better.
The BigBig Won Blitz 2 has no Inner Deadzone. The stick responds immediately to even the slightest movement, which is excellent for aiming accuracy and micro-control. This makes it a great choice for precision-heavy games like first-person shooters (e.g., Valorant or Apex Legends).
For comparison, many budget gamepads often have a moderate to large Inner Deadzone, while premium controllers typically aim for a slight or no deadzone for better precision.
Want to learn more? Check out our video explanation of how the Inner Deadzone works.
Outer Deadzone
The Outer Deadzone is the area near the edge of the stick's physical range where you are still deflecting it, but the system already registers the maximum 100% input. As a result, maximum speed (e.g., camera turn) is reached before the stick hits the physical gate. This narrows the effective range for precise aiming and can make edge control feel too sharp or twitchy. The smaller this zone, the better, as it allows you to use the entire physical range of the stick for precise control.
The BigBig Won Blitz 2 has no Outer Deadzone (< 0.4 mm). Any 'lost' range at the edges is within the margin of error, allowing you to use the full physical range of the stick. This is an ideal result for precise and predictable gameplay.
Per-stick breakdown for the BigBig Won Blitz 2: the left stick measures < 0.4 mm, which corresponds to no Outer Deadzone, while the right stick measures < 0.4 mm, which corresponds to no Outer Deadzone. This helps show whether the controller loses range evenly on both sticks or if one stick is noticeably weaker near full tilt.
Both sticks show the same measured Outer Deadzone, which suggests consistent edge behavior between movement and camera inputs.
For comparison, budget gamepads often have moderate to large Outer Deadzones, while premium controllers strive for minimal or no deadzone to maximize control.
Want to learn more? Check out our video explanation of how the Outer Deadzone works.
Stick Asymmetry
Stick Asymmetry measures the consistency of the joystick's response across different directions at partial deflection (~80%) using physical limiters (brackets). This reveals asymmetries that might be hidden by clamping at 100% deflection. A high asymmetry score indicates a problem where for the same physical movement, the reported coordinates are inconsistent. The lower the percentage, the more predictable the stick movements. Lower is better.
For the BigBig Won Blitz 2, the Stick Asymmetry is 11.1% for the left stick and 5.7% for the right stick. Higher values can lead to noticeable inconsistencies, potentially impacting aiming or movement in games.
Testing Methodology: It's crucial to note that this test is performed at partial stick deflection (~80%), using special physical limiters (brackets/clips). Testing at 100% deflection often hides asymmetries because the controller's output is clamped at the maximum value, artificially 'smoothing' the resulting shape. Our method reveals the true performance of the stick in the ranges most critical for gameplay. This precise approach was also utilized by Linus Tech Tips in their controller review.
For comparison, many budget gamepads show asymmetry levels above 30%, while high-end controllers typically stay below 10% for better uniformity.
Learn more about how different gamepads perform in the Stick Asymmetry test and how to conduct such a test in this article. You can learn how to test joystick asymmetry yourself from this video.
Circle Error
Circle Error evaluates how closely the stick’s movement follows a perfect circle. A high Circle Error means the path is more square-like, which can cause inconsistent speeds when moving diagonally - your character might move faster or slower than expected. The lower the percentage, the better, as it ensures smooth, uniform movement in all directions.
For the BigBig Won Blitz 2, the Circle Error is 7.2% for the left stick and 7.1% for the right stick. This is an excellent result, providing smooth, natural diagonal movement similar to premium controllers.
For comparison, budget gamepads often have Circle Errors above 12%, resulting in 'square' feeling sticks, while high-quality ones aim for under 8% for better smoothness.
Want to learn more? Check out our video explanation of how Circle Error impacts performance.
Resolution (Stick Bitness)
Stick Bitness measures the precision of the joystick’s analog input, similar to bit depth in audio. Higher bitness means more distinct positions the stick can register, leading to smoother and more accurate control. Lower bitness can result in 'stepping' or less fluid movement, especially noticeable in slow, precise actions like aiming.
Unlike declared digital resolution, our True Bitness metric is derived from actual physical stick movement, reflecting the usable positions the stick can produce in practice.
For the BigBig Won Blitz 2, the movement-based True Bitness is 11.0 bits on both sticks. This is moderate precision. It is generally adequate for most games, though some stepping might be noticeable in high-precision aiming.
This corresponds to a measured Step Resolution of 0.00098 on the left stick and 0.00098 on the right. In practical terms, this means the gamepad can register about 1,024 individual steps from the center to the edge (SFC) on the left stick, and 1,024 SFC on the right.
For comparison, many budget gamepads have around 8 bits, while premium ones often exceed 10 bits for superior accuracy.
Want to learn more? Check out our video explanation of how Stick Bitness affects control. It is important to note that the video specifies the resolution of the stick, not the bit depth; the higher the bit depth, the higher the resolution.
Center Error (Stick Centering)
Center Error (also referred to as Stick Centering) measures how accurately the joystick returns to its neutral (center) position after you release it. A low Center Error prevents stick drift - a common issue where your character or camera moves slightly in a game, even when you're not touching the stick. The lower the percentage, the better the centering, and the less likely you are to experience drift.
For the BigBig Won Blitz 2, the Center Error is 3% for the left joystick and 2.9% for the right stick. This is an excellent result. The sticks return almost perfectly to the center natively, without relying on an inner deadzone. This minimizes the risk of stick drift and is ideal for competitive gaming.
This test methodology intentionally employs a more rigorous approach by implementing small-angle deflection and release, which produces the most challenging conditions for stick re-centering. This technique differs from the conventional maximum-deflection method where the stick is pulled to its full range and released, as small-angle deflection better simulates the micro-adjustments typically executed during actual gameplay scenarios, providing more representative data on potential stick drift occurrence during normal use.
Want to learn more? Check out our video explanation of how Center Error works.
Cardinal Snapping
Cardinal Snapping (sometimes referred to as Axis Magnet) is a form of stick processing where the controller's output artificially 'snaps' or clings to the cardinal (horizontal and vertical) axes when the stick passes close to them. While this can make pure horizontal or vertical movements feel perfectly straight, it distorts the natural movement path and makes diagonal aiming or fine steering less predictable.
The BigBig Won Blitz 2 shows no Cardinal Snapping. This means the stick does not artificially cling to the horizontal or vertical axes, preserving your real movement path for consistent aiming and natural analog control.
Want to learn more? Check out our video explanation of how Cardinal Snapping affects stick behavior.
Disclaimer
We tested the BigBig Won Blitz 2 gamepad using a single unit, so keep in mind that other units of this model might perform slightly better or worse. In most cases, these differences are minor and shouldn’t affect your experience significantly. The results were obtained with the Stick Tracer program, and some values might vary if you use different software or testing methods.
Testing conditions, such as the gamepad’s firmware version (FW: 313333) or connection type, can also influence the results. If you have this gamepad, we’d love for you to share your own test results! This will help us build a more comprehensive picture of the BigBig Won Blitz 2’s performance across different units.
Full test results can be viewed on the test page.
Stick test results for BigBig Won Blitz 2 gamepad, by Danny89
Comment: Raw mode
Errors Panel
Inner Deadzone
The Inner Deadzone is the area around the center of the stick where small movements are not registered. This helps prevent stick drift or accidental inputs, but if the deadzone is too large, it can make aiming less precise, especially in games requiring fine control. We evaluate the Inner Deadzone based on how much you need to move the stick before it responds - the less movement required, the better.
The BigBig Won Blitz 2 has no Inner Deadzone. The stick responds immediately to even the slightest movement, which is excellent for aiming accuracy and micro-control. This makes it a great choice for precision-heavy games like first-person shooters (e.g., Valorant or Apex Legends).
For comparison, many budget gamepads often have a moderate to large Inner Deadzone, while premium controllers typically aim for a slight or no deadzone for better precision.
Want to learn more? Check out our video explanation of how the Inner Deadzone works.
Outer Deadzone
The Outer Deadzone is the area near the edge of the stick's physical range where you are still deflecting it, but the system already registers the maximum 100% input. As a result, maximum speed (e.g., camera turn) is reached before the stick hits the physical gate. This narrows the effective range for precise aiming and can make edge control feel too sharp or twitchy. The smaller this zone, the better, as it allows you to use the entire physical range of the stick for precise control.
The BigBig Won Blitz 2 has no Outer Deadzone (< 0.4 mm). Any 'lost' range at the edges is within the margin of error, allowing you to use the full physical range of the stick. This is an ideal result for precise and predictable gameplay.
Per-stick breakdown for the BigBig Won Blitz 2: the left stick measures < 0.4 mm, which corresponds to no Outer Deadzone, while the right stick measures < 0.4 mm, which corresponds to no Outer Deadzone. This helps show whether the controller loses range evenly on both sticks or if one stick is noticeably weaker near full tilt.
Both sticks show the same measured Outer Deadzone, which suggests consistent edge behavior between movement and camera inputs.
For comparison, budget gamepads often have moderate to large Outer Deadzones, while premium controllers strive for minimal or no deadzone to maximize control.
Want to learn more? Check out our video explanation of how the Outer Deadzone works.
Stick Asymmetry
Stick Asymmetry measures the consistency of the joystick's response across different directions at partial deflection (~80%) using physical limiters (brackets). This reveals asymmetries that might be hidden by clamping at 100% deflection. A high asymmetry score indicates a problem where for the same physical movement, the reported coordinates are inconsistent. The lower the percentage, the more predictable the stick movements. Lower is better.
For the BigBig Won Blitz 2, the Stick Asymmetry is 9.6% for the left stick and 6.1% for the right stick. Higher values can lead to noticeable inconsistencies, potentially impacting aiming or movement in games.
Testing Methodology: It's crucial to note that this test is performed at partial stick deflection (~80%), using special physical limiters (brackets/clips). Testing at 100% deflection often hides asymmetries because the controller's output is clamped at the maximum value, artificially 'smoothing' the resulting shape. Our method reveals the true performance of the stick in the ranges most critical for gameplay. This precise approach was also utilized by Linus Tech Tips in their controller review.
For comparison, many budget gamepads show asymmetry levels above 30%, while high-end controllers typically stay below 10% for better uniformity.
Learn more about how different gamepads perform in the Stick Asymmetry test and how to conduct such a test in this article. You can learn how to test joystick asymmetry yourself from this video.
Circle Error
Circle Error evaluates how closely the stick’s movement follows a perfect circle. A high Circle Error means the path is more square-like, which can cause inconsistent speeds when moving diagonally - your character might move faster or slower than expected. The lower the percentage, the better, as it ensures smooth, uniform movement in all directions.
For the BigBig Won Blitz 2, the Circle Error is 7.3% for the left stick and 7.3% for the right stick. This is an excellent result, providing smooth, natural diagonal movement similar to premium controllers.
For comparison, budget gamepads often have Circle Errors above 12%, resulting in 'square' feeling sticks, while high-quality ones aim for under 8% for better smoothness.
Want to learn more? Check out our video explanation of how Circle Error impacts performance.
Resolution (Stick Bitness)
Stick Bitness measures the precision of the joystick’s analog input, similar to bit depth in audio. Higher bitness means more distinct positions the stick can register, leading to smoother and more accurate control. Lower bitness can result in 'stepping' or less fluid movement, especially noticeable in slow, precise actions like aiming.
Unlike declared digital resolution, our True Bitness metric is derived from actual physical stick movement, reflecting the usable positions the stick can produce in practice.
For the BigBig Won Blitz 2, the movement-based True Bitness is 8.0 bits on both sticks. This is poor precision. The low resolution will likely cause noticeable stepping and hinder precise control.
This corresponds to a measured Step Resolution of 0.00784 on the left stick and 0.00784 on the right. In practical terms, this means the gamepad can register about 127 individual steps from the center to the edge (SFC) on the left stick, and 127 SFC on the right.
For comparison, many budget gamepads have around 8 bits, while premium ones often exceed 10 bits for superior accuracy.
Want to learn more? Check out our video explanation of how Stick Bitness affects control. It is important to note that the video specifies the resolution of the stick, not the bit depth; the higher the bit depth, the higher the resolution.
Center Error (Stick Centering)
Center Error (also referred to as Stick Centering) measures how accurately the joystick returns to its neutral (center) position after you release it. A low Center Error prevents stick drift - a common issue where your character or camera moves slightly in a game, even when you're not touching the stick. The lower the percentage, the better the centering, and the less likely you are to experience drift.
For the BigBig Won Blitz 2, the Center Error is 3.1% for the left joystick and 2.3% for the right stick. This is a moderate result. Because this controller has no built-in inner deadzone to hide mechanical imperfections, its natural center error is exposed. You will likely need to configure a small deadzone within game settings (like in Apex Legends) to counteract potential drift.
This test methodology intentionally employs a more rigorous approach by implementing small-angle deflection and release, which produces the most challenging conditions for stick re-centering. This technique differs from the conventional maximum-deflection method where the stick is pulled to its full range and released, as small-angle deflection better simulates the micro-adjustments typically executed during actual gameplay scenarios, providing more representative data on potential stick drift occurrence during normal use.
Want to learn more? Check out our video explanation of how Center Error works.
Cardinal Snapping
Cardinal Snapping (sometimes referred to as Axis Magnet) is a form of stick processing where the controller's output artificially 'snaps' or clings to the cardinal (horizontal and vertical) axes when the stick passes close to them. While this can make pure horizontal or vertical movements feel perfectly straight, it distorts the natural movement path and makes diagonal aiming or fine steering less predictable.
The BigBig Won Blitz 2 shows no Cardinal Snapping. This means the stick does not artificially cling to the horizontal or vertical axes, preserving your real movement path for consistent aiming and natural analog control.
Want to learn more? Check out our video explanation of how Cardinal Snapping affects stick behavior.
Disclaimer
We tested the BigBig Won Blitz 2 gamepad using a single unit, so keep in mind that other units of this model might perform slightly better or worse. In most cases, these differences are minor and shouldn’t affect your experience significantly. The results were obtained with the Stick Tracer program, and some values might vary if you use different software or testing methods.
Testing conditions, such as the gamepad’s firmware version (FW: 313333) or connection type, can also influence the results. If you have this gamepad, we’d love for you to share your own test results! This will help us build a more comprehensive picture of the BigBig Won Blitz 2’s performance across different units.
Full test results can be viewed on the test page.
Stick test results for BigBig Won Blitz 2 gamepad, by Danny89
Comment: Raw mode
Errors Panel
Inner Deadzone
The Inner Deadzone is the area around the center of the stick where small movements are not registered. This helps prevent stick drift or accidental inputs, but if the deadzone is too large, it can make aiming less precise, especially in games requiring fine control. We evaluate the Inner Deadzone based on how much you need to move the stick before it responds - the less movement required, the better.
The BigBig Won Blitz 2 has no Inner Deadzone. The stick responds immediately to even the slightest movement, which is excellent for aiming accuracy and micro-control. This makes it a great choice for precision-heavy games like first-person shooters (e.g., Valorant or Apex Legends).
For comparison, many budget gamepads often have a moderate to large Inner Deadzone, while premium controllers typically aim for a slight or no deadzone for better precision.
Want to learn more? Check out our video explanation of how the Inner Deadzone works.
Outer Deadzone
The Outer Deadzone is the area near the edge of the stick's physical range where you are still deflecting it, but the system already registers the maximum 100% input. As a result, maximum speed (e.g., camera turn) is reached before the stick hits the physical gate. This narrows the effective range for precise aiming and can make edge control feel too sharp or twitchy. The smaller this zone, the better, as it allows you to use the entire physical range of the stick for precise control.
The BigBig Won Blitz 2 has no Outer Deadzone (< 0.4 mm). Any 'lost' range at the edges is within the margin of error, allowing you to use the full physical range of the stick. This is an ideal result for precise and predictable gameplay.
Per-stick breakdown for the BigBig Won Blitz 2: the left stick measures < 0.4 mm, which corresponds to no Outer Deadzone, while the right stick measures < 0.4 mm, which corresponds to no Outer Deadzone. This helps show whether the controller loses range evenly on both sticks or if one stick is noticeably weaker near full tilt.
Both sticks show the same measured Outer Deadzone, which suggests consistent edge behavior between movement and camera inputs.
For comparison, budget gamepads often have moderate to large Outer Deadzones, while premium controllers strive for minimal or no deadzone to maximize control.
Want to learn more? Check out our video explanation of how the Outer Deadzone works.
Stick Asymmetry
Stick Asymmetry measures the consistency of the joystick's response across different directions at partial deflection (~80%) using physical limiters (brackets). This reveals asymmetries that might be hidden by clamping at 100% deflection. A high asymmetry score indicates a problem where for the same physical movement, the reported coordinates are inconsistent. The lower the percentage, the more predictable the stick movements. Lower is better.
For the BigBig Won Blitz 2, the Stick Asymmetry is 10.3% for the left stick and 6.2% for the right stick. Higher values can lead to noticeable inconsistencies, potentially impacting aiming or movement in games.
Testing Methodology: It's crucial to note that this test is performed at partial stick deflection (~80%), using special physical limiters (brackets/clips). Testing at 100% deflection often hides asymmetries because the controller's output is clamped at the maximum value, artificially 'smoothing' the resulting shape. Our method reveals the true performance of the stick in the ranges most critical for gameplay. This precise approach was also utilized by Linus Tech Tips in their controller review.
For comparison, many budget gamepads show asymmetry levels above 30%, while high-end controllers typically stay below 10% for better uniformity.
Learn more about how different gamepads perform in the Stick Asymmetry test and how to conduct such a test in this article. You can learn how to test joystick asymmetry yourself from this video.
Circle Error
Circle Error evaluates how closely the stick’s movement follows a perfect circle. A high Circle Error means the path is more square-like, which can cause inconsistent speeds when moving diagonally - your character might move faster or slower than expected. The lower the percentage, the better, as it ensures smooth, uniform movement in all directions.
For the BigBig Won Blitz 2, the Circle Error is 7.3% for the left stick and 7.3% for the right stick. This is an excellent result, providing smooth, natural diagonal movement similar to premium controllers.
For comparison, budget gamepads often have Circle Errors above 12%, resulting in 'square' feeling sticks, while high-quality ones aim for under 8% for better smoothness.
Want to learn more? Check out our video explanation of how Circle Error impacts performance.
Resolution (Stick Bitness)
Stick Bitness measures the precision of the joystick’s analog input, similar to bit depth in audio. Higher bitness means more distinct positions the stick can register, leading to smoother and more accurate control. Lower bitness can result in 'stepping' or less fluid movement, especially noticeable in slow, precise actions like aiming.
Unlike declared digital resolution, our True Bitness metric is derived from actual physical stick movement, reflecting the usable positions the stick can produce in practice.
For the BigBig Won Blitz 2, the movement-based True Bitness is 8.0 bits on both sticks. This is poor precision. The low resolution will likely cause noticeable stepping and hinder precise control.
This corresponds to a measured Step Resolution of 0.00784 on the left stick and 0.00784 on the right. In practical terms, this means the gamepad can register about 127 individual steps from the center to the edge (SFC) on the left stick, and 127 SFC on the right.
For comparison, many budget gamepads have around 8 bits, while premium ones often exceed 10 bits for superior accuracy.
Want to learn more? Check out our video explanation of how Stick Bitness affects control. It is important to note that the video specifies the resolution of the stick, not the bit depth; the higher the bit depth, the higher the resolution.
Center Error (Stick Centering)
Center Error (also referred to as Stick Centering) measures how accurately the joystick returns to its neutral (center) position after you release it. A low Center Error prevents stick drift - a common issue where your character or camera moves slightly in a game, even when you're not touching the stick. The lower the percentage, the better the centering, and the less likely you are to experience drift.
For the BigBig Won Blitz 2, the Center Error is 2.3% for the left joystick and 2.3% for the right stick. This is an excellent result. The sticks return almost perfectly to the center natively, without relying on an inner deadzone. This minimizes the risk of stick drift and is ideal for competitive gaming.
This test methodology intentionally employs a more rigorous approach by implementing small-angle deflection and release, which produces the most challenging conditions for stick re-centering. This technique differs from the conventional maximum-deflection method where the stick is pulled to its full range and released, as small-angle deflection better simulates the micro-adjustments typically executed during actual gameplay scenarios, providing more representative data on potential stick drift occurrence during normal use.
Want to learn more? Check out our video explanation of how Center Error works.
Cardinal Snapping
Cardinal Snapping (sometimes referred to as Axis Magnet) is a form of stick processing where the controller's output artificially 'snaps' or clings to the cardinal (horizontal and vertical) axes when the stick passes close to them. While this can make pure horizontal or vertical movements feel perfectly straight, it distorts the natural movement path and makes diagonal aiming or fine steering less predictable.
The BigBig Won Blitz 2 shows no Cardinal Snapping. This means the stick does not artificially cling to the horizontal or vertical axes, preserving your real movement path for consistent aiming and natural analog control.
Want to learn more? Check out our video explanation of how Cardinal Snapping affects stick behavior.
Disclaimer
We tested the BigBig Won Blitz 2 gamepad using a single unit, so keep in mind that other units of this model might perform slightly better or worse. In most cases, these differences are minor and shouldn’t affect your experience significantly. The results were obtained with the Stick Tracer program, and some values might vary if you use different software or testing methods.
Testing conditions, such as the gamepad’s firmware version (FW: 313333) or connection type, can also influence the results. If you have this gamepad, we’d love for you to share your own test results! This will help us build a more comprehensive picture of the BigBig Won Blitz 2’s performance across different units.
Full test results can be viewed on the test page.
Stick Movement Linearity Test
BigBig Won Blitz 2 specifications
Internal
External
Features
Connection
Software
Platforms


User comments
I'm curious, is there a latency threshold that people consider acceptable?
I found the results to be quite unexpected given how minimal an effect these settings seemed to have on stick response time, which might say something about their impact on buttons but that's a topic worth exploring further.
Curious to see how the latency would change with the anti-shake coefficient at its lowest and highest settings in stick settings. Would love to know if it makes a noticeable difference.
Thanks for putting in the time to thoroughly test the BigBig Won Blitz 2, really appreciate it.
Note information for this gamepad is incorrect. On the description here it says that it has m3 and m4 buttons, and 4 back paddles. This is wrong. it has 2 back paddles.
When you play a game on PS5 or another console, you must face issues like buttons not working properly, and you don't know which button is creating an issue, and you are disturb so I have a solution for you." http://padprotools.com/" With this site, you can easily check your gampad tester free online on this site.
I primarily play Warzone. I’ve maxed prestige to 1000 in BO6 and BO7. The feel of this controller can be beat. I have a Gamesir 2024 controller, but it just can't match this one. I’ve tried to use the Xbox Elite 2 controller this one is a must. I have owned Razer controllers for 360 days and this one outdoes all of them. I’m curious about the new Gamesir 8k my only issue is that it does not have any changeable thumb heights for sticks. My KD currently is 2.97. Blitz 2 is worth having in your collection also the USB you do have to cut small USB pieces to put in usb it tends to be loose. But I have had no other issues other than that. And make sure you save the Windows app and play around with the stick resolution and macros settings. Turbo function is way better than game sir you can go down to 0 ms inputs instead of 5ms.
I'm still on the fence about the paddle comfort, it's a bit of a love-hate thing - they're okay for a while then suddenly give me wrist cramps. Can we get a review for the 8bitdo 2C and Ultimate 2 as well?
I understand the wrist cramps; they can be annoying. Regarding the 8bitdo 2C and Ultimate 2, you can find their reviews on the gamepadla website if you're interested.
@Buzzsaw Bill I totally get the wrist cramps. By the way, what's a good stick latency under the Prometheus 82 method? I heard the 2C has around 7 ms, but I'm curious if that's noticeable in gameplay.
What's the deal with the stick calibration on the BigBig Won Blitz 2? I've had mine for months and it's been rock solid, but I've heard a few people complaining about it being finicky, especially with movement.
Dude, yeah I had that problem too, it's like it just lost its calibration or something. Try calibrating it manually, not just letting the game do it, that usually sorts it out for me.
@Pedro Celsius I did that and it still did jack squat. Calibrating manually just seems like a more thorough process, you know? Still, I'm not giving up on it yet, I wanna get it working.
My right stick is being a bit finicky on my Blitz 2 TMR, especially when I move it in a circle - it feels really stiff on the outer edges and it's super distracting during games. Guess it's time to take a closer look.
dude, you got the metal pad version? i got the plastic one and it's already rubbing on my desk, so yeah, that's probably your problem right there